Lowering and hoisting the transducer from the user interface
The Operating Panel controls the lowering and hoisting of the transducer. Dedicated buttons are provided for the physical transducer locations. You can also control the transducer movements from the top bar.
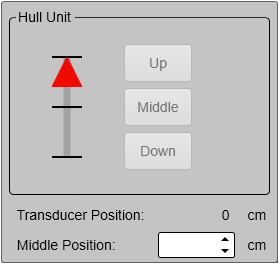
The Hull Unit Control dialog box allows you to lower and hoist the transducer. The dialog box also provides status information about the transducer position. You can monitor the current position of the transducer and make changes to the position defaults.
If the transducer hits larger objects or bottom, the transducer shaft may be bent, or - in worst case - it can be broken off. A broken transducer shaft will cause water leakage through the top of the shaft. If you suspect that the transducer shaft is seriously damaged do not retract the transducer to its upper position. To prevent serious damage to the vessel or the vessel stability, you must have a water pump and a warning system in the sonar room.
Procedure
- Make sure that you have sufficient water depth below the keel before you lower the transducer.
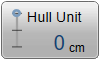
- Select Hull Unit on the top bar to open the Hull Unit Control dialog box.
- To lower the transducer select Down.
- To hoist the transducer select Up.
- To move the transducer to its predefined middle position,
select Middle.
If you have the large hull unit you can define two middle positions.
Retracting the transducer to a middle position may be useful if you use the ST90 system simultaneously with other sonars. A higher position will permit you to increase the vessel speed. If you operate in very shallow waters, you may also reduce the risk of hitting bottom. However, placing the transducer immediately under the hull may increase the flow noise.