Shortcut menus
Shortcut menus provide additional functionality for operation.
How to open
Right-click in the view to open the shortcut menu.
Description
To make a choice, right-click in the view and select the relevant option on the shortcut menu.
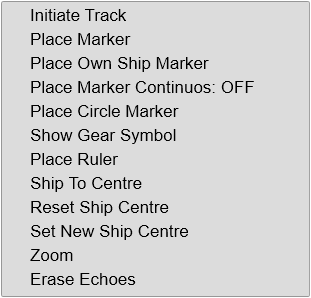
The functionality provided by the shortcut menus differ from one view to another depending on the view properties. The Inspection views do not provide shortcut menus. Functions from all shortcut menus are listed. The screen capture is provided as an example.
In this context, the phrase marker is used to identify a visual symbol placed in the display presentation. By placing a marker on the echo it is regarded as an object that you can act upon. If relevant, you can further classify the object as a target.
The phrase target is used to identify an echo in the display presentation that you wish to act upon. The echo may be from a material item, a shallow, reef or rock, or from fish, fish schools or mammals. You must decide which echoes that shall be classified as targets, and whether you shall start target tracking.
If you have placed markers on several echoes to make them objects, you can select one of these and give it priority status. The bearing line in the relevant views will automatically be locked on the object with this priority to reflects its bearing. You can only give priority status to one object. The priority is identified with a "P".
- Initiate Track
During normal operation, some echoes are clearly more interesting than others. In many situations specific echoes may be regarded as targets. To set up the ST90 system to provide such information, you can start target tracking.
The Initiate Track function allows you to manually start target tracking.
Place the cursor over the echo you wish to track. Select Initiate Track. The tracked target is regarded as an object, and it is identified with a circle and two lines. The bearing line is automatically locked on the object to reflects its bearing.
By default, a new manually initiated tracked object is automatically given priority status. If another object has this priority, the status is automatically transferred to the new object. The priority is identified with a "P".
Tip:On the User Settings Setup page, de-select New Manually Initiated Track if you do not want new tracked targets to become priority targets. This page is located in the Installation dialog box. To open the page, select Installation on the Setup menu.
- Place Marker
Select Place Marker to create a visual marker symbol at the cursor's current position. Each marker is shown as a small triangle with or without a short identifying label.
- Delete Marker
Delete Marker allows you to delete a marker from the current view. Select Delete Marker.
Tip:The Operating Panel offers all necessary control functions for normal operation. It further allows you to assign certain functions to dedicated buttons and switches. The Mk2 Operating Panel is fitted with three function buttons. The Mk3 Operating Panel is fitted with two rotary switches. Each of these can be assigned a specific function.
Select Delete Oldest Marker to use the Operating Panel to remove the oldest marker from the echo presentation.
This page is located in the Installation dialog box. To open the page, select Installation on the Setup menu.
- Set Priority Marker
You can give priority status to one marker to identify the relevant object as the most important target or position. If another object has this priority, the status is automatically transferred to the new object. The priority is identified with a "P". When a marker is given priority it can be regarded as a position track. Relevant information about the priority target can be found in the lower left corner of the view.
- Place Own Ship Marker
Select Place Own Ship Marker to add a square symbol to the vessel’s current position in the echo presentation. The own ship marker is now regarded as an object. All information about the object is shown in the Objects menu listed as "OSM".
- Delete Own Ship Marker
Use Delete Own Ship Marker on the shortcut menu to delete the marker from the current view.
- Place Marker Continuous
Place Marker Continuous is an on/off switch. When enabled, left-click in a ST90 view to add new marker. Each click produces a new marker.
- Place Circle Marker
Press Circle Marker on the Operating Panel, or select Place Circle Marker to add a circular marker to the ST90 presentation. A circular symbol appears at the cursor position. The circle is drawn with the same diameter as your purse. By means of the circle you can see the size of the school relative to your purse. You can only add one circle marker to the display presentation.
The Objects menu does not provide any information about the circle marker.
To delete the circle marker, press Circle Marker on the Operating Panel, or right-click to select Remove Circle Marker on the shortcut menu.
The Fishing Gear function allows you to define the size of your trawl or purse seine. This function is opened from the Setup menu.
- Show Gear Symbol / Place Gear Symbol / Remove Gear Symbol

The gear symbol is provided as a tool to help you plan and shoot the purse seine. You can activate this function from the short-cut menu or use the dedicated button on the Operating Panel. For use with a purse seine, the intended process follows:
To start the process:
- Press Gear on the Operating Panel. — or:
- Right-click and select Show Gear Symbol on the shortcut menu.
This places a circle marker in the view. The size and location of the marker is defined by the choices you have made with the Fishing Gear function. Until you proceed, the marker follows the movements of the vessel by keeping its relative location to the bow. This allows you to position your vessel in the best possible location before you shoot the purse seine.
When you shoot the net:
- Press Gear on the Operating Panel. — or:
- Right-click and select Place Gear Symbol on the shortcut menu.
The first timer starts when you select Place Gear Symbol.
A rectangular marker is placed in the view, and marks the position where the purse seine was shot. The circular marker is disconnected from the vessel movements, and acts as a guideline for your manoeuvring. The history line shows the movements of your vessel. Since the ST90 system knows the length of your net, it places a second marker on this line when half the length has been spent. When the entire net has been spent, a third rectangular marker is shown. In this phase the Fishing Gear function is disabled.
The first timer stops when the progress bar reads 100%. This action starts the second timer, which stops when you select Remove Gear Symbol.
When the process is finalized:
- Press Gear on the Operating Panel. — or:
- Right-click and select Remove Gear Symbol on the shortcut menu to delete the markers from the view.
- Show Trawl Symbol / Remove Trawl Symbol
The Show Trawl Symbol option appears on the short-cut menu when you have activated a single or dual trawl using the Fishing Gear function.
You can activate this function from the short-cut menu or use the dedicated button on the Operating Panel. When the function is activated, the Horizontal view presents a trawl illustration. The size and location of the image reflect the measurements you added in the Fishing Gear Setup dialog box.
The trawl image appears aft of the vessel symbol. When your vessel turns, the trawl presentation will reflect this, but the location and movements could be more precise. If you want an accurate trawl positioning, you must equip the trawl with relevant positioning sensors and connect the data to the ST90 system.
- Place Ruler
Place the cursor over the first echo. Right-click to open the shortcut menu and select Place Ruler. The ruler starts wherever you place the cursor, and ends when you release the button. The length and relative bearing of the ruler is displayed next to it. Once a ruler has been established you can not make changes to it. You can place as many rulers as you like in the view.
Select Delete Ruler or Delete All Rulers on the shortcut menu to delete one or all rulers from the view.
- Delete Ruler
Use Delete Ruler to remove one selected ruler from the view. Place the cursor on the line, right-click when the cursor turns into a finger, then select Delete Ruler from the shortcut menu.
- Delete All Rulers
Delete All Rulers allows you to delete all the rulers in the current view.
- Ship To Centre
Select Ship to Centre to move the own ship symbol back to the centre of the view. This function is typically used when you have used the Set New Ship Centre function to move the ship symbol away from the centre of the view.
- Reset Ship Centre
This function is useful when you need to "reset" the view after using the Set New Ship Centre or Zoom functions. Right-click and Reset Ship Centre to move the vessel symbol to the centre of the presentation.
- Set New Ship Centre
Place the cursor anywhere in the view, right-click and select Set New Ship Centre. The function moves the vessel symbol to the selected position.
- Zoom / Zoom Reset
Place the cursor anywhere in the view, right-click and select Zoom. Only one zoom level is provided. Once zoom is activated, the text on the shortcut menu changes to Zoom Reset. Select Zoom Reset to restore the original view
- Erase Echoes
Select Erase Echoes to "refresh" the view by deleting all the current echoes.